这篇文章是“在WordPress中创建一个简单的CRM”系列的第二部分。在第一部分中我们已经创建了一个WordPress插件并且用它注册了一个自定义文章类型:‘Contacts’;但是我们还没有讨论如何存储该文章类型中的附加信息。
创建自定义字段
WordPress中有一个add_meta_box()函数,通过这个函数,插件和主题开发者可以注册适应各种WordPress管理界面的自定义元框。
在WordPress中定义了许多WordPress自己的元框来显示一些文章或页面的信息。比如在页面上你会发现有页面属性元框,如下图:

现在我们来为自定义文章类型:Contacts添加一个元框。打开之前一个教程中建立的Plugin文件。然后在该文件的构造函数中编写如下代码。这个代码针对add_meta_boxes动作注册了register_meta_boxes()函数。
/**
* Constructor. Called when plugin is initialised
*/
function __construct() {
add_action( 'init', array( $this, 'register_custom_post_type' ) );
add_action( 'add_meta_boxes', array( $this, 'register_meta_boxes' ) );
}
下一步,自我们的register_meta_boxes() 函数中添加add_meta_box()。这样是为了告诉WordPress:我们想要创建一个名叫Contact Details的元框。需要我们做的是在构造函数下面添加如下代码:
/**
* Registers a Meta Box on our Contact Custom Post Type, called 'Contact Details'
*/
function register_meta_boxes() {
add_meta_box( 'contact-details', 'Contact Details', array( $this, 'output_meta_box' ), 'contact', 'normal', 'high' );
}
上述的元框还需要output_meta_box()函数来渲染。所以我们还需要在register_meta_boxes() 函数下面添加如下代码:
/**
* Output a Contact Details meta box
*
* @param WP_Post $post WordPress Post object
*/
function output_meta_box($post) {
}
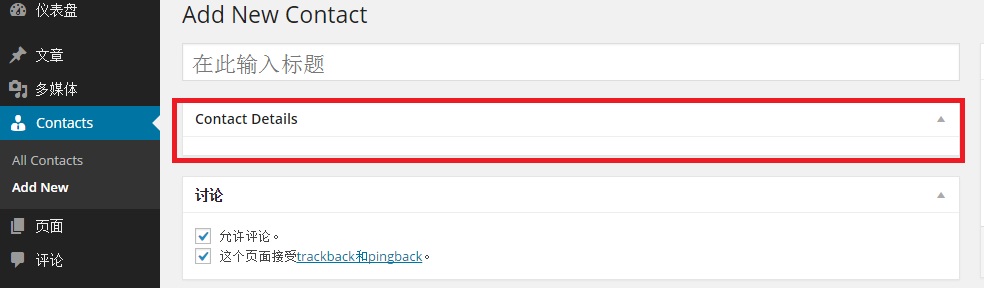
添加完成后保存代码,然后打开新建的自定义文章类型点击Add New创建一个新的Contact,如果上述代码全部编译成功你将会看到如下界面:
为元框添加字段
首先我们来添加一个邮件地址的字段。按照如下代码编写output_meta_box函数:
/**
* Output a Contact Details meta box
*
* @param WP_Post $post WordPress Post object
*/
function output_meta_box( $post ) {
// Output label and field
echo ( '<label for="contact_email">' . __( 'Email Address', 'tuts-crm' ) . '</label>'  );
echo ( '<input type="text" name="contact_email" id="contact_email" value="' . esc_attr( $email ) . '" />'  );
}
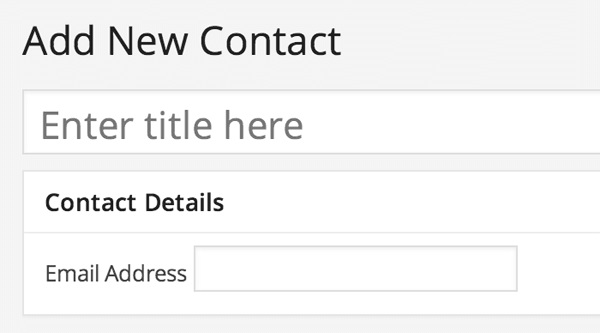
保存代码,刷新添加Contact界面你会看到有名叫Email Address的字段出现在元框中:
保存自定义字段的数据
我们的步骤还没结束,我们还需要命令WordPress保存字段中用户输入的内容。我们可以针对save_post动作注册一个函数来实现这项功能。
跟之前的注册动作一样,我们需要在构造函数中完成:
/**
* Constructor. Called when plugin is initialised
*/
function __construct() {
add_action( 'init', array( $this, 'register_custom_post_type' ) );
add_action( 'add_meta_boxes', array( $this, 'register_meta_boxes' ) );
add_action( 'save_post', array( $this, 'save_meta_boxes' ) );
}
然后创建save_meta_boxes()函数,代码如下:
/**
* Saves the meta box field data
*
* @param int $post_id Post ID
*/
function save_meta_boxes( $post_id ) {
// Check this is the Contact Custom Post Type
if ( 'contact' != $_POST['post_type'] ) {
return $post_id;
}
// Check the logged in user has permission to edit this post
if ( ! current_user_can( 'edit_post', $post_id ) ) {
return $post_id;
}
// OK to save meta data
$email = sanitize_text_field( $_POST['contact_email'] );
update_post_meta( $post_id, '_contact_email', $email );
}
这个函数中包含多个动作,因为save_post动作可以由WordPress其他插件频繁地调用。为了确保只对我们的自定义字段的内容的更新进行保存,所以我们需要分装起来。最后用update_post_meta对文章的元数据进行存储。
读取自定义字段中的数据
创建一个新的Contact,并输入一个邮件地址。保存该Contact,你会发现该邮件地址已经不在字段中出现如下图:

我们需要对output_meta_box()函数做如下修改来读取数据并呈现在输入字段中:
/**
* Output a Contact Details meta box
*
* @param WP_Post $post WordPress Post object
*/
function output_meta_box($post) {
$email = get_post_meta( $post->ID, '_contact_email', true );
// Output label and field
echo ( '<label for="contact_email">' . __( 'Email Address', 'tuts-crm' ) . '</label>' );
echo ( '<input type="text" name="contact_email" id="contact_email" value="' . esc_attr( $email ) . '" />' );
}
编写完后保存。然后重复上述新建Contact的步骤,当你保存后会发现字段中的内容不会消失。
安全
在提交和处理表单数据时,安全性是非常重要的。所以我们在保存时要确保我们的数据源是值得信赖的。如果我们保存了不可相信的数据,这样可能对我们数据照成破坏。
WordPress会为我们提供随机数,这个随机数会与我们的表单数据一同被发送。当保存例程运行时,这个随机数可以被检查从而确保它与我们所期望的值相匹配。
现在我们需要在output_meta_box()和save_meta_boxes()中添加安全代码。函数编辑如下:
output_meta_box()中编辑:
/**
* Output a Contact Details meta box
*
* @param WP_Post $post WordPress Post object
*/
function output_meta_box($post) {
$email = get_post_meta( $post->ID, '_contact_email', true );
// Add a nonce field so we can check for it later.
wp_nonce_field( 'save_contact', 'contacts_nonce' );
// Output label and field
echo ( '<label for="contact_email">' . __( 'Email Address', 'tuts-crm' ) . '</label>' );
echo ( '<input type="text" name="contact_email" id="contact_email" value="' . esc_attr( $email ) . '" />' );
}
save_meta_boxes()中编辑:
/**
* Saves the meta box field data
*
* @param int $post_id Post ID
*/
function save_meta_boxes( $post_id ) {
// Check if our nonce is set.
if ( ! isset( $_POST['contacts_nonce'] ) ) {
return $post_id;
}
// Verify that the nonce is valid.
if ( ! wp_verify_nonce( $_POST['contacts_nonce'], 'save_contact' ) ) {
return $post_id;
}
// Check this is the Contact Custom Post Type
if ( 'contact' != $_POST['post_type'] ) {
return $post_id;
}
// Check the logged in user has permission to edit this post
if ( ! current_user_can( 'edit_post', $post_id ) ) {
return $post_id;
}
// OK to save meta data
$email = sanitize_text_field( $_POST['contact_email'] );
update_post_meta( $post_id, '_contact_email', $email );
}
这样在我们运行保存的例程时添加了两个检查过程:
1、检查随机数表单是否已经被创建,如果没有则不可以保存。
2、检查随机数表单的值是否跟我们预期的一样。如果不是则不能保存。
最后创建你自己的Contact,并且确保邮件地址可以被保存。
关于下一篇:
在下一篇教程中我们将为大家介绍使用先进的自定义字段来为我们的Contact添加自定义字段,以至于我们能够创建一个丰富的用户界面和更广泛的输入类型。