作为一个自由设计师,开发商或企业老总的你肯定知道集中保存潜在客户数据的重要性,而且难度绝对不是一般的大。就算你已经解决了存储问题,但是随时保持数据更新仍然是一个很大的难题。
我们将试着通过以下几个项目来有效的解决上述问题:注册一个自定义文章类型;创建一个自定义文章域;在WordPress管理界面显示自定义文章类型;查找我们的自定义域的数据并进入CRM界面。
现在网上有许多免费或付费的插件可供我们选择用于创建CRM,比如WP-CRM。另外我们还可以选择一些第三方CRM服务,比如Salesforce或highrise。但是这些工具不是过于复杂不好上手,就是与我们的一些特别流程不兼容。
这篇文章将为大家介绍一个简单的解决方案,而且在使用的时候还可以根据自己的需求来对该方案进行扩展。另外我们还需要学习一些WordPress API方程的使用方法。
创建一个CRM插件
首先我们要创建一个WordPress插件,然后在之后的过程中对其进行扩展。
打开目录WP-content/plugins,然后在该目录下新建一个文件夹取名为tut-crm.创建完成后我们开始添加我们的源代码。
建立插件头
在新建的目录下创建一个文件并命名为tuts-crm.php,然后把下面的代码添加到该文件中。
<?php
/**
* Plugin Name: Tuts+ CRM
* Plugin URI: #
* Version: 1.0
* Author: Tuts+
* Author URI: http://code.tutsplus.com
* Description: A simple CRM system for WordPress
* License: GPL2
*/
?>
上述代码虽然看上去只是一个PHP注释,但是WordPress可以通过该代码获得插件的名字、作者,还有对插件功能的描述。
代码导入后对文件进行保存。然后打开WordPress仪表盘,点击进入已安装插件界面,你会发现刚刚创建的插件已经在该页面中出现,然后启用该插件。

建立插件类
我们的网站跟大部分WordPress网站一样使用了许多插件。所以我们选择的函数名,比如(crm())有可能与其他插件中的函数重名从而产生冲突。
大多数插件采用一个函数(function_exists())来解决该问题,代码编写如下:
if ( ! function_exists( 'crm' ) ) {
function crm() {
// Do something here
}
}
但是这样虽然防止了冲突,但是一旦发生冲突你的插件将不再工作。
今天我们给大家介绍另一种方法来解决上述问题——将你的函数分装在一个对象类中。打开刚才创建的PHP文件,将以下代码添加到插件头描述的下面。
class WPTutsCRM {
/**
* Constructor. Called when plugin is initialised
*/
function __construct() {
}
}
$wpTutsCRM = new WPTutsCRM;
这样就成功创建了我们的PHP类。
注册我们的自定义文章类型
页面和帖子是两个相似的WordPress文章类型。我们可以通过添加自定义文章类型来扩展WordPress的功能。首先我们要为我们的插件构造函数注册一个action。代码如下:
function __construct() {
add_action( 'init', array( $this, 'register_custom_post_type' ) );
}
这个代码的功能是运行刚才创建的PHP类中的register_custom_post_type函数。
显然,接下来我们需要做的就是添加register_custom_post_type函数:
/**
* Registers a Custom Post Type called contact
*/
function register_custom_post_type() {
register_post_type( 'contact', array(
'labels' => array(
'name'               => _x( 'Contacts', 'post type general name', 'tuts-crm' ),
'singular_name'      => _x( 'Contact', 'post type singular name', 'tuts-crm' ),
'menu_name'          => _x( 'Contacts', 'admin menu', 'tuts-crm' ),
'name_admin_bar'     => _x( 'Contact', 'add new on admin bar', 'tuts-crm' ),
'add_new'            => _x( 'Add New', 'contact', 'tuts-crm' ),
'add_new_item'       => __( 'Add New Contact', 'tuts-crm' ),
'new_item'           => __( 'New Contact', 'tuts-crm' ),
'edit_item'          => __( 'Edit Contact', 'tuts-crm' ),
'view_item'          => __( 'View Contact', 'tuts-crm' ),
'all_items'          => __( 'All Contacts', 'tuts-crm' ),
'search_items'       => __( 'Search Contacts', 'tuts-crm' ),
'parent_item_colon'  => __( 'Parent Contacts:', 'tuts-crm' ),
'not_found'          => __( 'No conttacts found.', 'tuts-crm' ),
'not_found_in_trash' => __( 'No contacts found in Trash.', 'tuts-crm' ),
),
// Frontend
'has_archive'        => false,
'public'             => false,
'publicly_queryable' => false,
// Admin
'capability_type' => 'post',
'menu_icon'     => 'dashicons-businessman',
'menu_position' => 10,
'query_var'     => true,
'show_in_menu'  => true,
'show_ui'       => true,
'supports'      => array(
'title',
'author',
'comments',
),
) );
}
代码编写完成后保存,这样,一个命名为contact的自定义文章类型被创建成功。(Register_post_type接受以下数组中的参数):
| key | Description |
| labels | An array of labels describing this Post Type. These are used within the WordPress Administration. |
| has_archive | Enables archives on the frontend web site. |
| public | Whether the Post Type should be available in the WordPress Administration and frontend web site. |
| publicly_queryable | Whether this Custom Post Type can be queried from the frontend web site. |
| capability_type | Used to define the capabilities the User should have in order to add, edit and delete Posts for this Post Type. This could be an existing capability (such as post) |
| menu_icon | Either the URL to the menu icon image, or a dashicons-class (3.8 or higher). Used in the WordPress Administration. |
| menu_position | A number indicating where in the WordPress Administration menu to display this item. Lower number means it appears sooner. |
| query_var | Sets the query_var for this post type. Defaults to the name of the Custom Post Type. |
| show_in_menu | Whether to show this Custom Post Type in the WordPress Administration menu. |
| show_ui | Whether to generate a UI in the WordPress Administration to allow adding, editing and deleting Posts for this Custom Post Type. |
| supports | An array detailing the fields available to this Custom Post Type. Examples include title, editor, excerpt andpage-attributes |
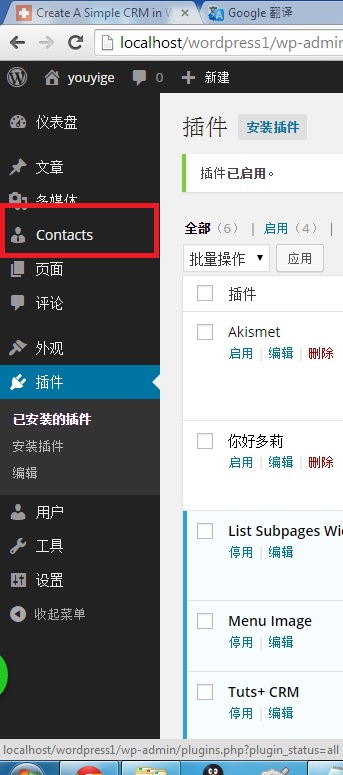
保存你的插件,然后打开你的WordPress仪表盘。你会发现出现一个新的菜单标题为Contacts,如下图:

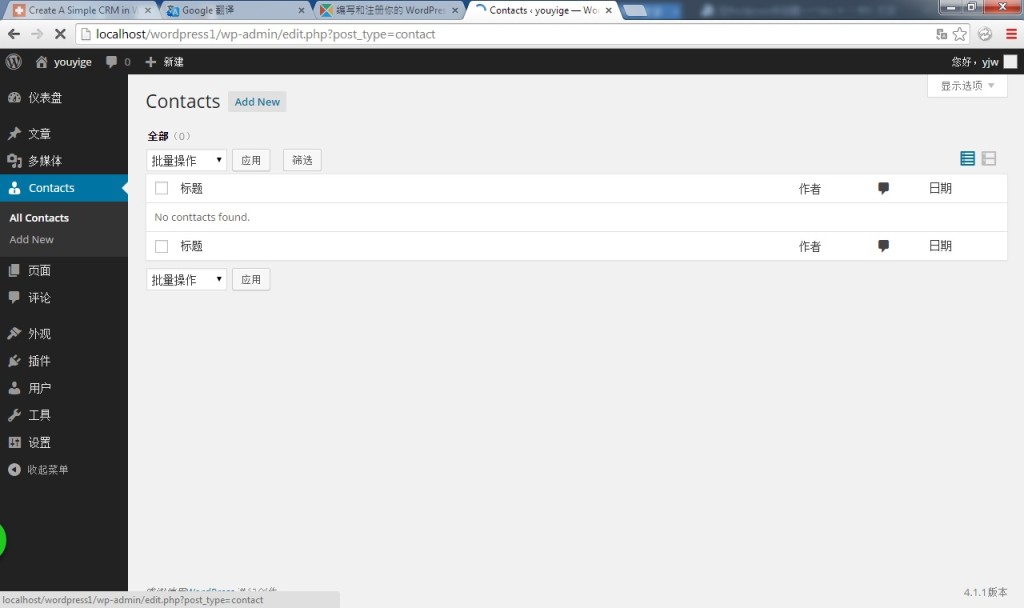
点开该菜单你会进入一个熟悉的界面,如下图,该界面跟管理文章和页面的界面一样。

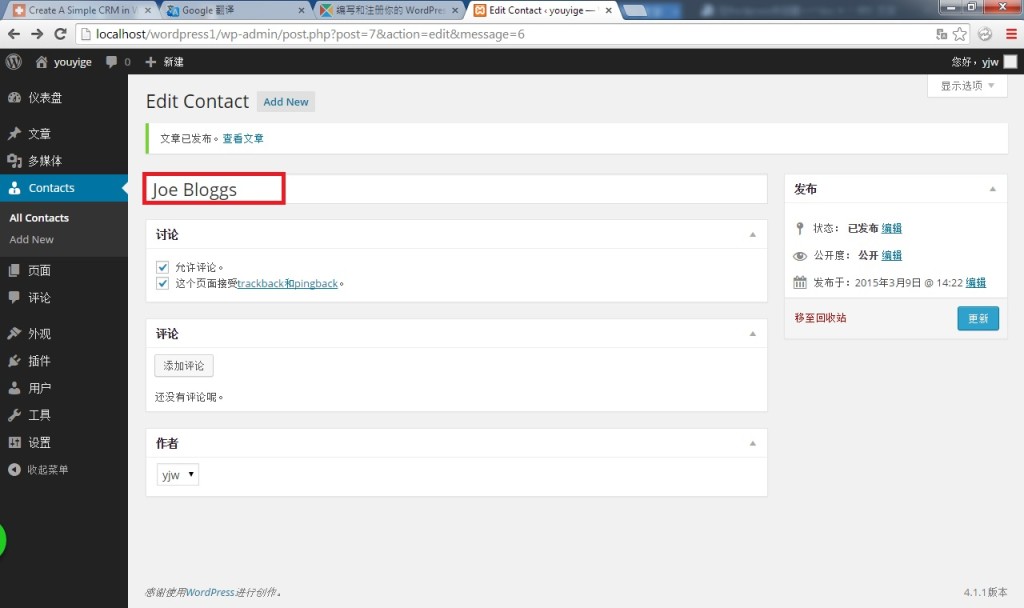
点击顶部的Add New按钮然后在题目一廊键入Joe Bloggs。最点击发布按钮。


最后回到之前的contacts菜单界面检查自定义文章是否被保存。点击WordPress主菜单下的Contacts菜单进入如下界面,你会看到我们刚才发布的contact,说明我们的自定义文章类型成功创建。
这篇教程就给大家介绍到这里。该系列的下一篇教程则给大家介绍如何为我们的自定义文章类型:Contact添加字段,以至于我们能够储存更多有关我们客户的详细信息。


