创建widget的最后一个阶段就是在网站上显示你的widget。完成这个阶段,你需要进一步编辑WP_Widget 类。
这个阶段分成两步,分别是:1、在WordPress widget之外添加一个函数,用来确认初始页面可以使用;2、在WP_Widget类中编辑widget函数
添加初始函数
打开你之前建立的插件文件,在文件中WP_Widget类前面添加以下函数,然后保存:
<?php
function tutsplus_check_for_page_tree() {
//start by checking if we're on a page
if( is_page() ) {
global $post;
// next check if the page has parents
if ( $post->post_parent ){
// fetch the list of ancestors
$parents = array_reverse( get_post_ancestors( $post->ID ) );
// get the top level ancestor
return $parents[0];
}
// return the id  - this will be the topmost ancestor if there is one, or the current page if not
return $post->ID;
}
}
?>
编写WP_Widget类中的widget函数
接下来,我们需要编辑之前创建的空的widget函数。
在你之前建立的插件文件中找到之前创建的空的widget函数,对其进行如下编辑:
function widget( $args, $instance ) {
// kick things off
extract( $args );
echo $before_widget;
echo $before_title . 'In this section:' . $after_title;
// run a query if on a page
if ( is_page() ) {
// run the tutsplus_check_for_page_tree function to fetch top level page
$ancestor = tutsplus_check_for_page_tree();
// set the arguments for children of the ancestor page
$args = array(
'child_of' => $ancestor,
'depth' => $instance[ 'depth' ],
'title_li' => '',
);
// set a value for get_pages to check if it's empty
$list_pages = get_pages( $args );
// check if $list_pages has values
if( $list_pages ) {
// open a list with the ancestor page at the top
?>
<ul >
<?php // list ancestor page ?>
<li >
<a href="<?php echo get_permalink( $ancestor ); ?>"><?php echo get_the_title( $ancestor ); ?></a>
</li>
<?php
// use wp_list_pages to list subpages of ancestor or current page
wp_list_pages( $args );;
// close the page-tree list
?>
</ul>
<?php
}
}
}
上述代码的意义在于:首先检查我们是否在当前页面上,然后根据之前相关函数的输出和在WordPress小工具表单中已设置好的$depth变量的值,定义list_pages()函数的参数。
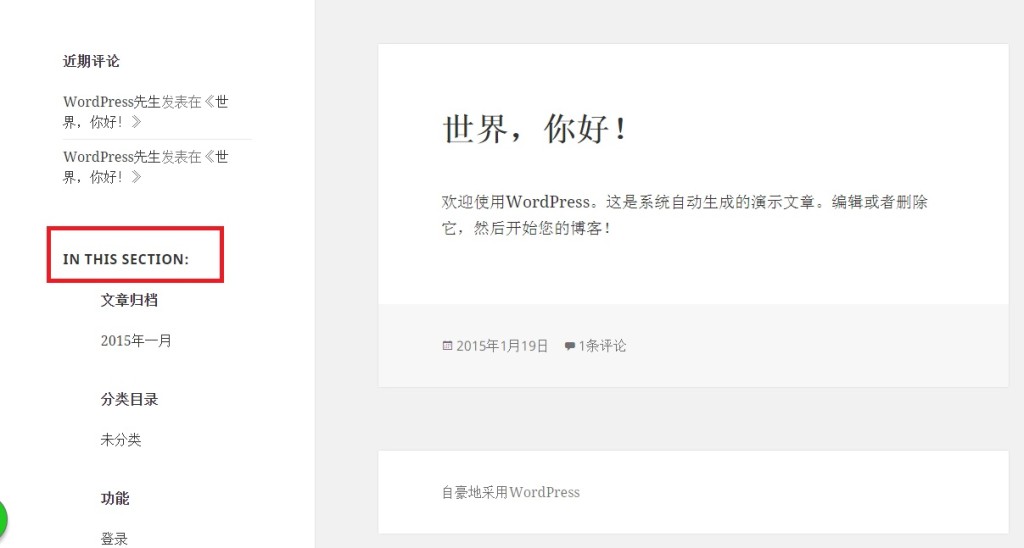
编辑完成后保存文件然后打开小工具界面,添加该widget并打开网址,你会发现相应目录会在网站页面上的相应位置显示出来,如下图:
最终插件:
现在一个完整的widget插件已经生成。
以下是我们经过五个教程的所有步骤之后widget插件文件的最终代码:
<?php
/*Plugin Name: List Subpages Widget
Description: This widget checks if the current page has parent or child pages and if so, outputs a list of the highest ancestor page and its descendants. This file supports part 5 of the series to create the widget and doesn't give you a functioning widget.
Version: 0.5
Author: Rachel McCollin
Author URI: http://rachelmccollin.com
License: GPLv2
*/
?>
<?php
?>
<?php
/*******************************************************************************
function tutsplus_check_for_page_tree() - checks if the current page is in a page tree.
*******************************************************************************/
?>
<?php
function tutsplus_check_for_page_tree() {
//start by checking if we're on a page
if( is_page() ) {
global $post;
// next check if the page has parents
if ( $post->post_parent ){
// fetch the list of ancestors
$parents = array_reverse( get_post_ancestors( $post->ID ) );
// get the top level ancestor
return $parents[0];
}
// return the id - this will be the topmost ancestor if there is one, or the current page if not
return $post->ID;
}
}
?>
<?php
class Tutsplus_List_Pages_Widget extends WP_Widget {
function __construct() {
parent::__construct(
// base ID of the widget
'tutsplus_list_pages_widget',
// name of the widget
__('List Related Pages', 'tutsplus' ),
// widget options
array (
'description' => __( 'Identifies where the current page is in the site structure and displays a list of pages in the same section of the site. Only works on Pages.', 'tutsplus' )
)
);
}
function form( $instance ) {
$defaults = array(
'depth' => '-1'
);
$depth = $instance[ 'depth' ];
// markup for form ?>
<p>
<label for="<?php echo $this->get_field_id( 'depth' ); ?>">Depth of list:</label>
<input type="text" id="<?php echo $this->get_field_id( 'depth' ); ?>" name="<?php echo $this->get_field_name( 'depth' ); ?>" value="<?php echo esc_attr( $depth ); ?>">
</p>
<?php
}
function update( $new_instance, $old_instance ) {
$instance = $old_instance;
$instance[ 'depth' ] = strip_tags( $new_instance[ 'depth' ] );
return $instance;
}
function widget( $args, $instance ) {
// kick things off
extract( $args );
echo $before_widget;
echo $before_title . 'In this section:' . $after_title;
// run a query if on a page
if ( is_page() ) {
// run the tutsplus_check_for_page_tree function to fetch top level page
$ancestor = tutsplus_check_for_page_tree();
// set the arguments for children of the ancestor page
$args = array(
'child_of' => $ancestor,
'depth' => $instance[ 'depth' ],
'title_li' => '',
);
// set a value for get_pages to check if it's empty
$list_pages = get_pages( $args );
// check if $list_pages has values
if( $list_pages ) {
// open a list with the ancestor page at the top
?>
<ul >
<?php // list ancestor page ?>
<li >
<a href="<?php echo get_permalink( $ancestor ); ?>"><?php echo get_the_title( $ancestor ); ?></a>
</li>
<?php
// use wp_list_pages to list subpages of ancestor or current page
wp_list_pages( $args );;
// close the page-tree list
?>
</ul>
<?php
}
}
}
}
?>
<?php
/*******************************************************************************
function tutsplus_register_list_pages_widget() - registers the widget.
*******************************************************************************/
?>
<?php
function tutsplus_register_list_pages_widget() {
register_widget( 'Tutsplus_List_Pages_Widget' );
}
add_action( 'widgets_init', 'tutsplus_register_list_pages_widget' );
?>
小结
创建一个可以正常工作的WordPress widget需要经过以下几个步骤:
- 注册你的widget
- 创建一个类,用来存放widget函数
- 编写构造函数,用来构造你的widget
- 通过编写form函数在widget界面上创建表单
- 编写update函数以至于widget可以及时地对表单中内容的修改进行保存。
- 编写一个定义输出的widget函数
上面的六项步骤全部完成后,你将拥有一个可以正常工作的WordPress widget,而且你可以根据自己的个人需要对其进行修改。