通过之前的教程,我们已经学会了如何在Wordpress中创建一个简单的CRM系统。上一篇教程我们学习了Advance Custom Fields插件。今天这篇教程我们将讨论如何将所有保存在自定义字段中的数据显示在Contacts列表中。
关于WP_List_Table
我们用WP_List_Table类定义一个呈现任意文章类型相关动作的表:

默认情况下,WordPress只显示勾选框,标题,作者,评论和日期。但是对于我们的Contact类型,我们需要快速的获取联系人的具体信息,所以默认下实现的内容对于我们来说是没有用的。
WordPress提供了一个filter和一个action,我们可以用他们在WP_List_Table中为任意文章类型添加新列。
首先我们需要添加manage_edit-{POST_TYPE}_columns到插件文件中的构造函数。{POST_TYPE}代表的是文章类型的标题。代码如下:
/**
* Constructor. Called when plugin is initialised
*/
function __construct() {
add_action( 'init', array( $this, 'register_custom_post_type' ) );
add_action( 'plugins_loaded', array( $this, 'acf_fields' ) );
add_filter( 'manage_edit-contact_columns', array( $this, 'add_table_columns' ) );
}
接下来需要做的就是定义函数:add_table_columns()。
/**
* Adds table columns to the Contacts WP_List_Table
*
* @param array $columns Existing Columns
* @return array New Columns
*/
function add_table_columns( $columns ) {
$columns['email_address'] = __( 'Email Address', 'tuts-crm' );
$columns['phone_number'] = __( 'Phone Number', 'tuts-crm' );
$columns['photo'] = __( 'Photo', 'tuts-crm' );
return $columns;
}
该函数中主要定义新建列的标题,并且该函数支持定义一组列,这将意味着我们可以为表格添加多个新建列。 编辑完成后保存文件。点击主菜单下的Contacts菜单,你会发现,表单中出现了两个新建列,如下图:

但是,现在你会发现在表单中没有显示列对应的字段内容。所以现在我们还需要添加manage_{POST_TYPE}_posts_custom_column到构造函数中。跟之前一样,这里的{POST_TYPE}代表的是文章类型的标题。具体代码如下:
/**
* Constructor. Called when plugin is initialised
*/
function __construct() {
add_action( 'init', array( $this, 'register_custom_post_type' ) );
add_action( 'plugins_loaded', array( $this, 'acf_fields' ) );
add_filter( 'manage_edit-contact_columns', array( $this, 'add_table_columns' ) );
add_action( 'manage_contact_posts_custom_column', array( $this, 'output_table_columns_data'), 10, 2 );
}
构造函数编辑完成后,定义函数:output_table_columns_data(),代码如下:
/**
* Outputs our Contact custom field data, based on the column requested
*
* @param string $columnName Column Key Name
* @param int $post_id Post ID
*/
function output_table_columns_data( $columnName, $post_id ) {
echo get_field( $columnName, $post_id );
}
编辑完成后保存文件,然后重新加载仪表盘,你会在表单中看到字段内容,如下图:
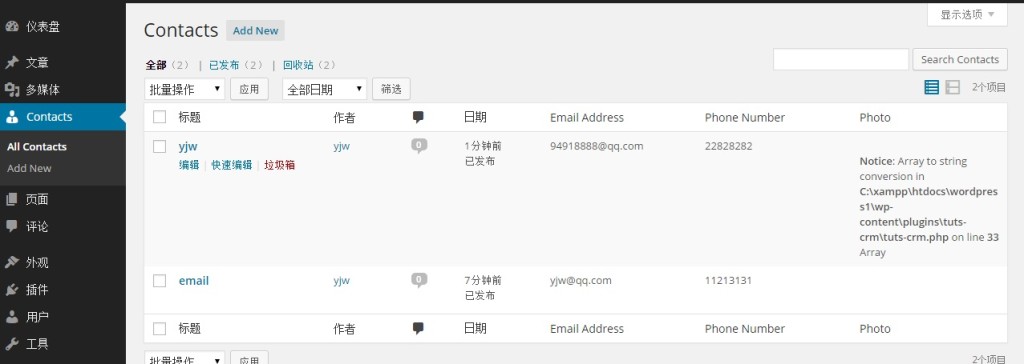
此时,photo栏要么是空的要么是输出一段PHP提示:
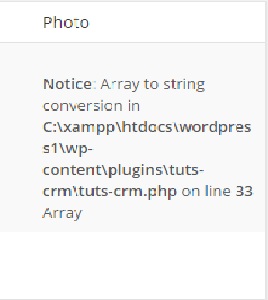
这主要是因为当你运用get_field()时,Advanced Custom Fields中返回的只是一个包括图像细节和每个注册图像尺寸的URL,宽度和高度的数组。所以我们我们需要改写函数output_table_columns_data() 来正确显示图像。代码修改如下:
/**
* Outputs our Contact custom field data, based on the column requested
*
* @param string $columnName Column Key Name
* @param int $post_id Post ID
*/
function output_table_columns_data( $columnName, $post_id ) {
// Field
$field = get_field( $columnName, $post_id );
if ( 'photo' == $columnName ) {
echo '<img src="' . $field['sizes']['thumbnail'].'" width="'.$field['sizes']['thumbnail-width'] . '" height="' . $field['sizes']['thumbnail-height'] . '" />';
} else {
// Output field
echo $field;
}
}
代码修改完成后保存,然后刷新页面你会发现,此时图像显示在了“Photo”栏中 。如下图:

按列排序
很多情况下,我们需要对我们的联系人进行按条件排序;比如:姓名、电话号码或电子邮件地址。平时我们经常用姓名来排序,今天我们来分享一下如何按电话号码和邮件地址来排序。
首先我们需要在构造函数中添加一个filter内容为:manage_{POST_TYPE}_posts_custom_column。这里的{POST_TYPPE}是泛指文章类型,在这里应该换成contact,代码如下:
/**
* Constructor. Called when plugin is initialised
*/
function __construct() {
add_action( 'init', array( $this, 'register_custom_post_type' ) );
add_action( 'plugins_loaded', array( $this, 'acf_fields' ) );
add_filter( 'manage_edit-contact_columns', array( $this, 'add_table_columns' ) );
add_action( 'manage_contact_posts_custom_column', array( $this, 'output_table_columns_data'), 10, 2 );
add_filter( 'manage_edit-contact_sortable_columns', array( $this, 'define_sortable_table_columns') );
}
对应上面的filter,我们接下来还需要定义一个define_sortable_table_columns()函数,用来告诉WordPress需要排序的列,代码如下:
/**
* Defines which Contact columsn are sortable
*
* @param array $columns Existing sortable columns
* @return array New sortable columns
*/
function define_sortable_table_columns( $columns ) {
$columns['email_address'] = 'email_address';
$columns['phone_number'] = 'phone_number';
return $columns;
}
编辑完成后,保存文件并刷新页面。此时,将鼠标停留在邮件地址,或电话号码一列上你会发现在标题后面出现了一个箭头,如下图:

但是,现在点击标题,你会发现不能正确的实现排序,因为这些在URL中设置的参数不被WordPress承认。所以我们还需要进行如下操作。
首先在构造函数中添加如下代码:
/**
* Constructor. Called when plugin is initialised
*/
function __construct() {
add_action( 'init', array( $this, 'register_custom_post_type') );
add_action( 'plugins_loaded', array( $this, 'acf_fields') );
add_filter( 'manage_edit-contact_columns', array( $this, 'add_table_columns') );
add_action( 'manage_contact_posts_custom_column', array( $this, 'output_table_columns_data'), 10, 2 );
add_filter( 'manage_edit-contact_sortable_columns', array( $this, 'define_sortable_table_columns') );
if ( is_admin() ) {
add_filter( 'request', array( $this, 'orderby_sortable_table_columns' ) );
}
}
然后定义函数:orderby_sortable_table_columns()。
/**
* Inspect the request to see if we are on the Contacts WP_List_Table and attempting to
* sort by email address or phone number.  If so, amend the Posts query to sort by
* that custom meta key
*
* @param array $vars Request Variables
* @return array New Request Variables
*/
function orderby_sortable_table_columns( $vars ) {
// Don't do anything if we are not on the Contact Custom Post Type
if ( 'contact' != $vars['post_type'] ) return $vars;
// Don't do anything if no orderby parameter is set
if ( ! isset( $vars['orderby'] ) ) return $vars;
// Check if the orderby parameter matches one of our sortable columns
if ( $vars['orderby'] == 'email_address' OR
$vars['orderby'] == 'phone_number' ) {
// Add orderby meta_value and meta_key parameters to the query
$vars = array_merge( $vars, array(
'meta_key' => $vars['orderby'],
'orderby' => 'meta_value',
));
}
return $vars;
}
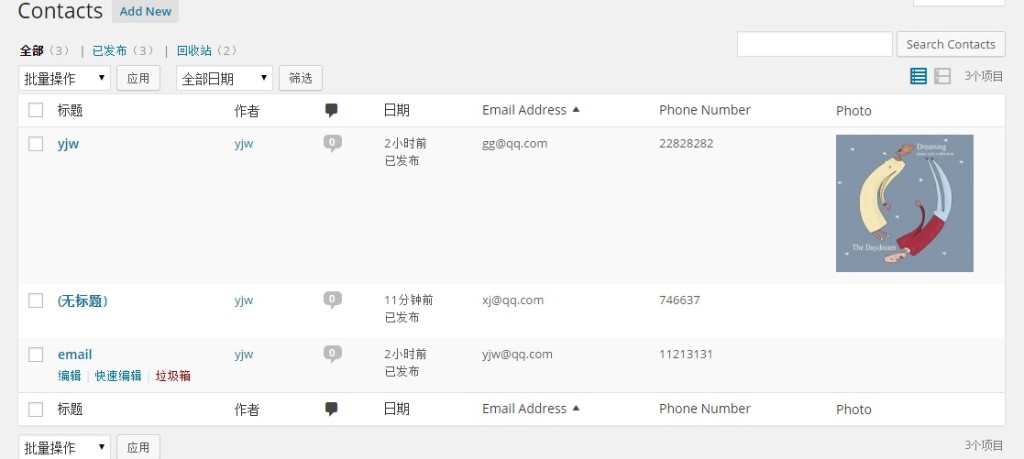
代码编辑完成后保存文件,刷新Contacts列表,然后点击邮箱地址或电话号码列标题,你会发现联系人按照预期设想排序成功:
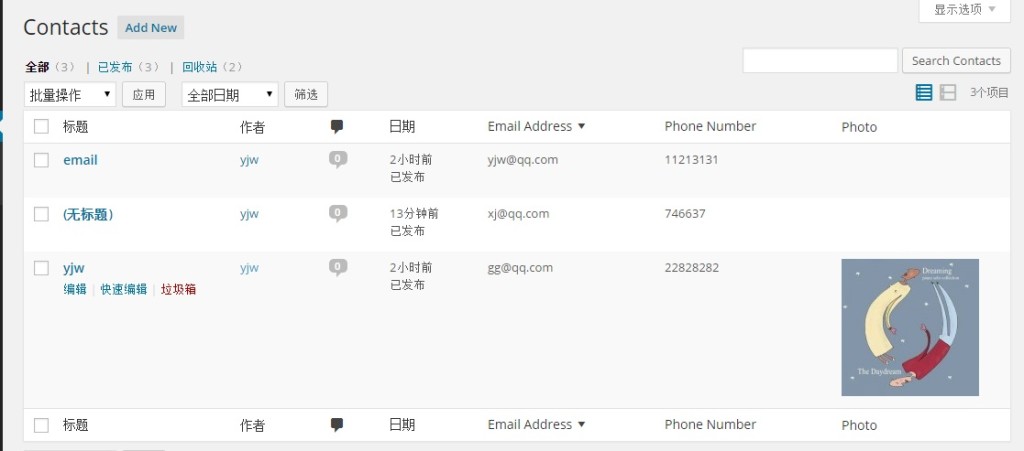
如果再点击一次标题你会发现列表反向排序:
这篇教程就给大家介绍到这里,本系列的下一篇教程我们将介绍扩展filter和查找功能,实现对存入Advanced Custom Fields中的数据进行查找。


